This tutorial will demostrate how to use MouseArea by creating a do-nothing button using JS object.
Project Design
Includes:
- A JS object that simulates the behavior of a button object.

JS Object Settings
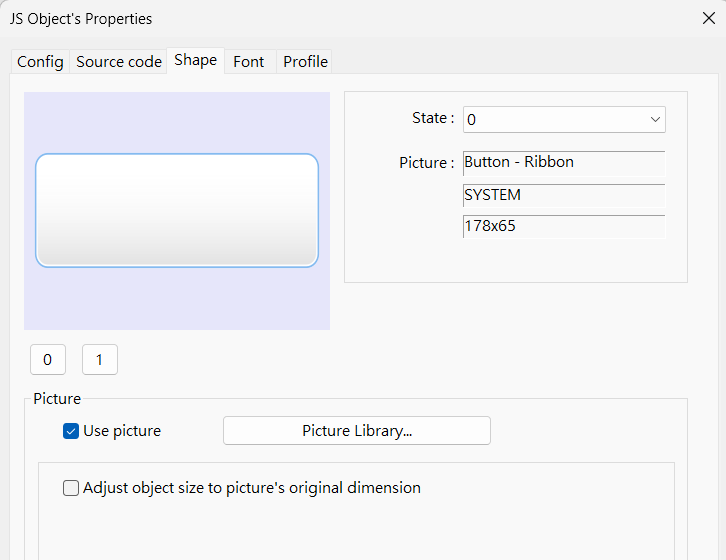
Select an image from [System Button] picture library in the [Shape] settings.

Source Code
// Create a MouseArea widget
let ma = new MouseArea();

// Bind the MouseArea to the JS object
this.widget.add(ma);

// When MouseArea triggers the 'mousedown' event, set the current state of the JS object to 1
ma.on("mousedown", (mouseEvent) => {
  this.state = 1;
});

// When MouseArea triggers the 'mouseup' event, set the current state of the JS object to 0
ma.on("mouseup", (mouseEvent) => {
  this.state = 0;
});
Execution Result
- Run the Simulation and observe:
- When the mouse button is pressed, the JS object will display the state 1 image.
- When the mouse button is released, the JS object will display the state 0 image.
Explanation
- MouseArea (object)
- Used to detect mouse events such as 'click', 'mouseup', 'mousedown', and 'mousemove', and allows users to trigger specific actions based on these events.
- this.widget (object)
- Refers to the Widget on the JS object, with an actual type of Container, which can be used to hold other Widgets.
- After creating a MouseArea widget (or Canvas widget), the user must insert it into this.widget for it to take effect.
- this.state (number)
- Represents the current state of the JS object.
- The appearance of the JS object (such as Label, Shape, and Picture) will change based on the object's current state.